 Slipcover Instructions:
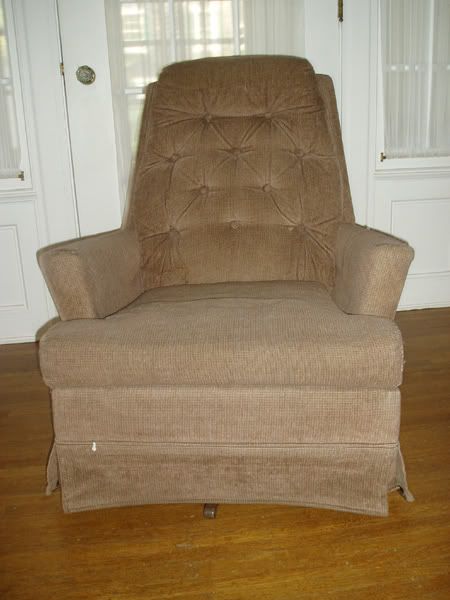
Here's a picture of the chair I will be reupholstering. It's a nice size for my daughter's reading nook.
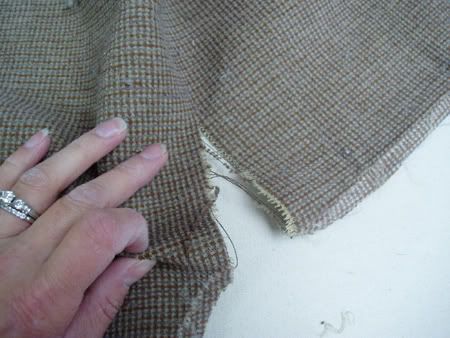
Pick a fabric for your new slipcover that will wear well. Choose a fabric that has the pattern woven all the way through – not printed – it will last a lot longer. Oh you should also wash it – I didn't and I'm sure I'm going to pay for it the first time my daughter spills something on it. It's gonna shrink. Hell, I'll have it dry cleaned.
I would start with the cushion – this is the easiest and will keep you motivated to actually finish it.
Take the cushion cover off – by unzipping and turning it inside out. Take your seam ripper and carefully take the cushion apart. I tried to pull it and I ripped part of the cushion piece. D*mn.
This will act as your pattern. If you decide to make a change in the design of the cushion – now is the time to do it. I choose to add welting in a contrasting fabric around the top and bottom edge of the cushion. To do this, just lay out the original cushion piece and lay the insert on top of it. Mark off where the cushion ends and add a 1" seam allowance. Now, use this piece to cut out one piece. Use the newly cut piece to create a matching second piece – so when you flip the cushion over – it will look the same and will wear evenly.
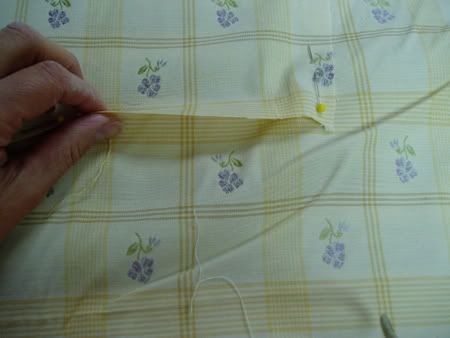
Lay out the new cut piece on top of the fabric matching up the fabric along all of the edges. This way it will be identical. Take the side and zipper pieces, lay them out and pin them down. Even better, iron the fabric so it will lay flat. However, if the fabric is really heavy, it may not be suitable to be ironed. I ironed my fabric anyway and ended up ruining my iron. BLERG! Fortunately, I had iron cleaner on hand so it wasn't a big deal just a pain in the a**.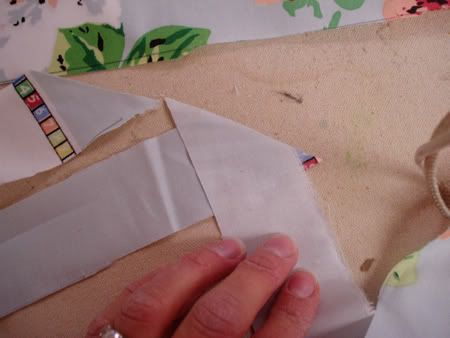
After cutting out all of the pieces, you can create some welting if you like. I choose a contrasting fabric. Cut out strips 1 ½" wide on the bias which just means that you want to fold the fabric up into a triangle and cut along the bottom edge. This edge will be at a 45 degree angle. You don't have to do this, but it will make the corners look better. Next, take your 1/4" welting and fold the fabric around it so the edges meet up on one side.
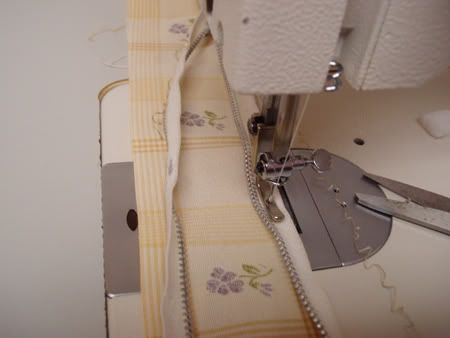
Use your zipper foot - aka the narrow foot – and sew as close to the welting edge as possible. You are going to want to cut a few strips because you don't want to run out. Where the fabric seams meet, place the fabric on top of each other so it is overlapping – correct side up – and cut it a 45 degree angle. Line up the cut edges and sew and press them open. It may look weird – but trust me it will work. Oh make sure you make a wide enough seam. If you don't, the edges may not line up when you lay it flat, so take heed.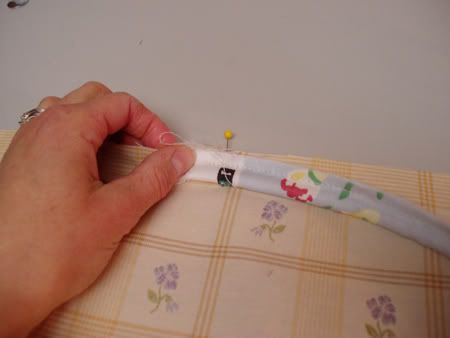
Now attach your welting at the back center of the cushion. This way you can hide the seam joint at the back. Using the same zipper foot, sew down the welting all the way around the cushion piece. At the corners, you will need to snip the welting about ½" before you make reach the corner. Stop sewing at this snip point and turn the welting in the new direction. Finish going around the enter piece and once you reach the back where you started, and stop sewing about 4" before you reach the beginning. Cut the piping so when you lay it down next to the starting position it should overlap by 2". Now open up the seam, cut out the welting so it matches up to the point of the beginning welting and fold under the fabric to create a finished edge.
Now place the beginning welting inside this pocket your created and sew it down treating it as one piece making sure all of the edges of the fabric line up. Now take a breath – and do it all over again – you have to do the top and bottom of the cushion.
Duhh, duhn, DUHN! The zipper. For those of you who have never done it before, I won't lie and say it's easy. In theory it is, but figuring it out is a B*tch. So just follow the pictures and directions and take your time. At the end of the day it won't really matter as it will be in the back of the cushion and no one will see it, but try anyway.
Take your two pieces that you cut out for the zipper. Take one piece – with the pattern going vertical and place the zipper face down along the top edge. Use your zipper foot and sew them together. To make your life easier, unzip the zipper and sew as much of it as possible. Once you get to the end, lift up the foot and zip up the zipper. Now you can keep sewing to the end. For the other side, place the other piece of fabric on top of the zipper with the fabric direction going down. When you open it up, the fabric will be on the top of the zipper and should be running in the right direction. Next, get your iron ready cause you're going to need to cover up the zipper with a fabric flap of sorts. Fold the fabric down from the top and up from the bottom. Make sure that the two flaps meet in the middle of the zipper. This will give the cushion a professional look.
Topstitch these flaps down once again using the zipper foot. Now attach the side pieces to the top and bottom cushions making sure to match up any plaids/stripes/large prints. This way the print will run continuously over the seams. Once again you will need to clip the corners and make sure you pin, pin and then pin some more. However, don't run over the pins as you might break your needle, once, twice – three times – when will I ever learn.
Ok, so you have the side pieces attached now attach the zippered portion. This piece will run along the back of the cushion and around to the sides by a few inches. If you don't have it run around the sides – then it will be a b*tch to get the insert back in.

Now sew the zippered portion to the side piece and sew the entire side down. Do this to the other side and now to the home stretch. If you did use welting, then you will need a piping foot and sew over the welting with the foot getting as close to the welting as possible. I use my finger nail and push into the fabric up to the welting. My mom taught me to do this and it definitely does the trick. Now just turn the cushion inside out and check if you accidentally snagged fabric whereby you will need t o use your seam ripper to fix it. I can't even tell you how much I hate fixing things – but it is a necessary evil.
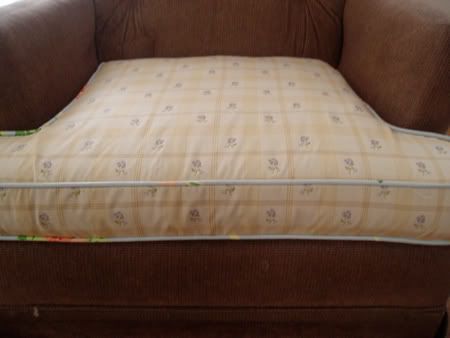
OK, now dance the jig cause your done with the cushion. Hurrah!
-Rock On!


13 comments:
It is certainly interesting for me to read that article. Thanx for it. I like such themes and everything connected to them. I definitely want to read a bit more on that blog soon.
It is certainly interesting for me to read that post. Thanks for it. I like such topics and anything that is connected to them. I definitely want to read a bit more soon.
Cool story as for me. It would be great to read something more about this matter. Thanx for giving that info.
Sexy Lady
UK escorts
Keep on posting such stories. I like to read articles like that. By the way add some pics :)
[B]NZBsRus.com[/B]
Forget Idle Downloads With NZB Downloads You Can Instantly Find Movies, Console Games, MP3s, Applications & Download Them at Flying Rates
[URL=http://www.nzbsrus.com][B]Usenet Search[/B][/URL]
Nice post you got here. I'd like to read a bit more about that theme. Thanx for sharing this material.
daka http://reggelsen.dk/cs/members/Bariatric-Surgery.aspx triggering http://reggelsen.dk/cs/members/Electric-Blankets.aspx silverstone http://sftc.communityserver.com/members/Furnace-Filters/default.aspx easing http://sftc.communityserver.com/members/Vending-Machines/default.aspx losing http://sftc.communityserver.com/members/Kitchen-Cabinets/default.aspx forthwith http://sftc.communityserver.com/members/Slipcovers/default.aspx dodd http://sftc.communityserver.com/members/Polar-Heart-Rate-Monitors/default.aspx offerors http://sftc.communityserver.com/members/Popcorn-Machines/default.aspx environs http://sftc.communityserver.com/members/Garage-Door-Openers/default.aspx hildebranda http://sftc.communityserver.com/members/Area-Rugs/default.aspx pardo http://sftc.communityserver.com/members/Omeprazole/default.aspx shrub http://sftc.communityserver.com/members/Vacuum-Cleaners/default.aspx flub http://sftc.communityserver.com/members/Annuity-Calculator/default.aspx zwhere http://sftc.communityserver.com/members/Bariatric-Surgery/default.aspx cossons http://sftc.communityserver.com/members/Electric-Blankets/default.aspx iowacity
You could easily be making money online in the hush-hush world of [URL=http://www.www.blackhatmoneymaker.com]blackhat code[/URL], You are far from alone if you don't know what blackhat is. Blackhat marketing uses not-so-popular or not-so-known methods to generate an income online.
Having read this material, I have learned for myself a lot of the new. Thanks
I think as this new "looser" fitting style of slipcovers do not always require custom tailoring, some furniture manufacturers are beginning to offer "ready made" slipcovers.
Hand mede - is cool! =P
Thank you for such a detailed instrusction. It will be useful at my future job in custom writing company.
Post a Comment